Instruction Manuals
Click Here to Return to Papier Avion Instructions Library
Engines – Type IV
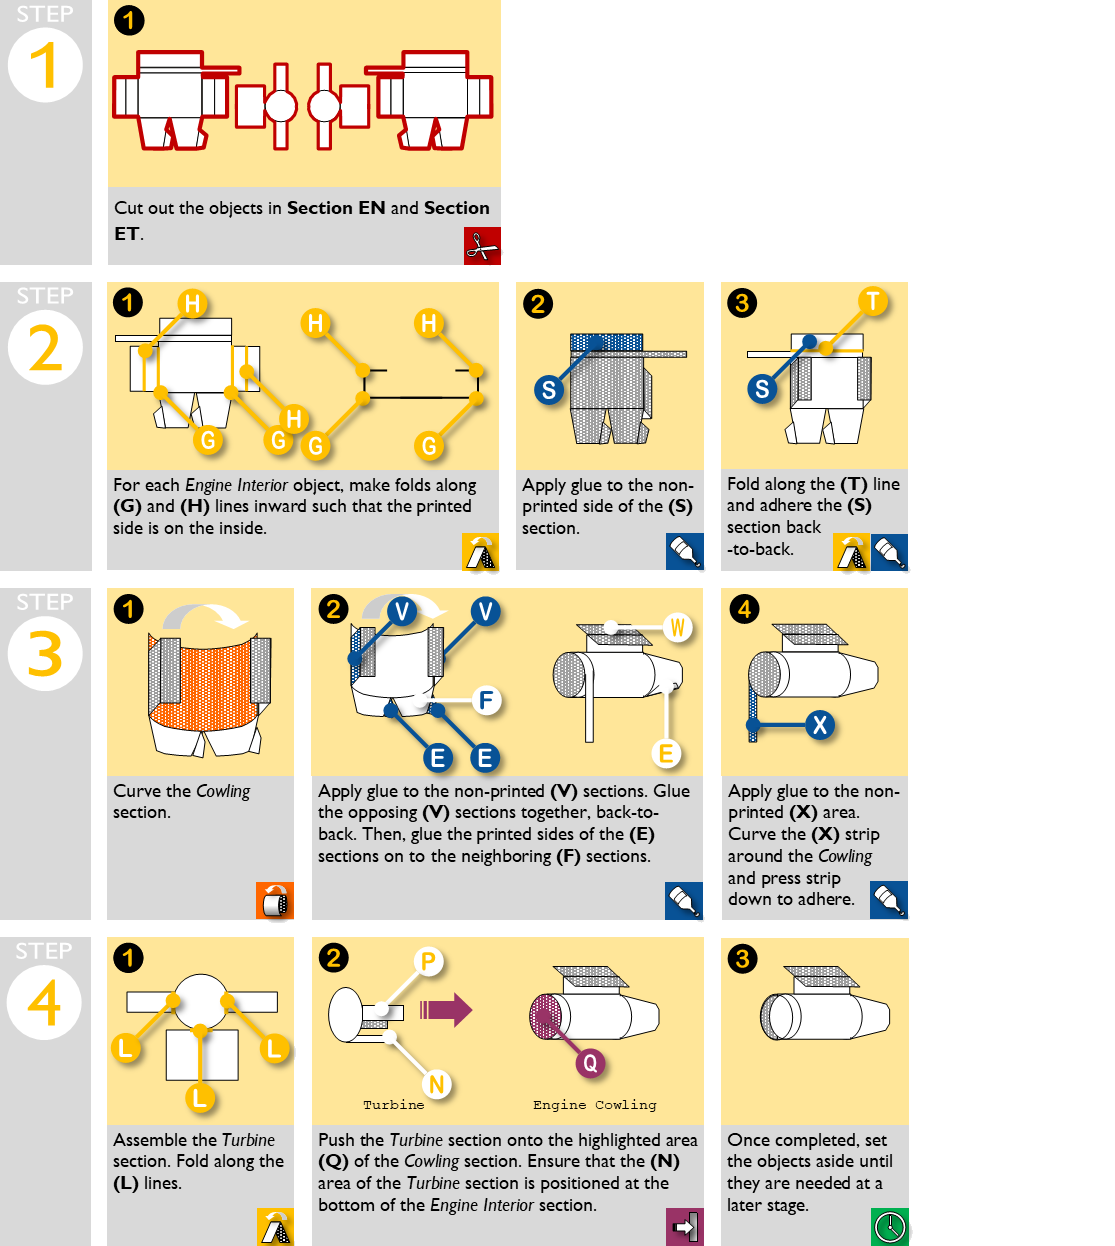 |
Legend
 |
FOLD Make a sharp fold along the dotted lines of the object as indicated. Be careful to ensure that you are folding in the correct direction — some folds may be inverse. After folding, pass a ruler or other straight object over the fold to increase the crispness of the fold. |
 |
CURVE Bend the object to create a cylindrical effect. Ensure that you are bending the object in the correct direction, as there are no guide lines provided for curved shapes. Important! Do not fold the object — folding the object will ruin the appearance of the object. |
 |
CUT Cut along the lines as indicated. For most shapes, the cutting line is faintly represented so as not to spoil the appearance of the object with unnecessary lines — the cutting line will generally be the border between the object shape and the surrounding neutral colour. |
 |
TAPE For some joins, it is preferable (though not required) to use tape. We recommend using Scotch tape suitable for archiving, to avoid discolouration. Use the tape sparingly, as too much tape may spoil the appearance of the object. |
 |
GLUE For many joins, we recommend using glue. Apply the glue carefully to the “hidden” side of the join (i.e., generally the non-printed area). Press down the other part of the join on the glued section until bonded. We recommend using glue sticks, as liquid-based glue can spoil the paper of card by causing it to become soggy. |
 |
SET ASIDE Once an object has been completed, it may be set aside until other objects have also been completed. Keep the completed object in a safe place until it is time to arrange it further. |
 |
INSERT Insert the object into the opening in the other corresponding object as shown. Once inserted, depending on the object, either join the objects together on the interior, or alternatively close and seal the larger object. |
